

To aim well with a bow sight, you must tune and adjust it. You may find it challenging, especially if this is your first time. To make sure you understand the importance of tuning and adjusting your bow sight, in this article, we explain it in detail.
How Does a Sight Work
During the first few adjustments, it may take some time to understand how the sight works. There are different types of sights, so we will talk about them individually.
1. Beginners / Cheap Sight
Elevation: Changing the elevation of your sight first requires unscrewing the thumbscrew on the side of your windage module. Once unscrewed, the windage module will slide along the sliding bar. As soon as the screw is loose, the assembly can be slid up and down.
Windage: You can adjust windage by turning the knob on the side of the sight. Your second option would be to twist the aperture. Turn the aperture either inwards or outwards to see how the sight moves. For most apertures, you must first loosen the front thumbscrew before twisting it.
2. Target / Advanced Sight

Elevation: The elevation is usually adjusted by loosening a small thumbscrew on some advanced sights. When adjusting your sight, you have two options: you can turn the knob and make small adjustments, or you can unlock the windage module and make larger adjustments.
Windage: On cheaper sights, windage works largely the same. You have two choices for adjusting windage. Either twist the aperture or turn the side knob. The aperture must be twisted to make large adjustments. You may need to loosen a locking screw. Hex or thumb screws can be used. Untighten these screws to be able to turn the sight in any direction.
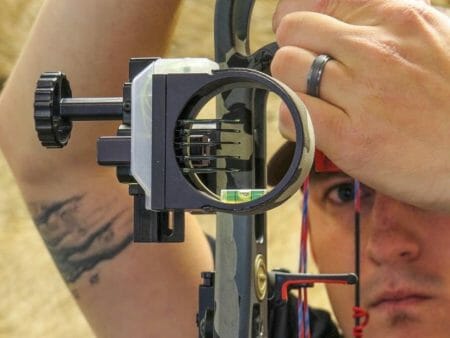
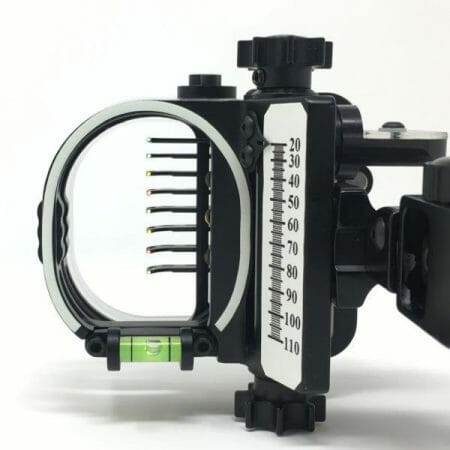
3. Multipin Sights

Elevation and Windage: Multipin sights often come with a finger or hex screw that locks the elevation and windage. These screws can be loosened by hand to adjust the elevation and windage. Unlike advanced target sights with multiple pins, multipin sights have windage and elevation controls. However, changing these settings will move all the pins.
Elevate a Pin: If you need to change a sight pin, loosen the small hex screw on the side of the sight. The sight pins can be adjusted manually by loosening this screw. Keep the sight pin in place when tightening the locking screw. Torque can sometimes cause the sight pin to move.
The Fundamentals of Sight Adjustment
- Don’t be afraid to move your sight. If your shots are all landing on one side of the target, your sight is probably not set up properly.
- The elevation and windage settings of your sight should not change once it has been configured. Only when you increase your distance should you lower it.
- There shouldn’t be a need to change your sight’s windage setting. At one range, your sight might not be properly centered if you shoot towards the center of the target at another range. Here is more information about locating your sight.
Center Shot:
While tuning a bow, our sight is always set center shot and we’ll learn how.
1. How to Adjust Your Sight for a Center Shot
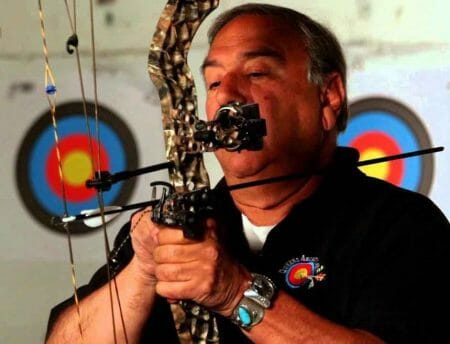
The center shot can be set in a variety of ways. To center your sight, follow these steps.
In a Single-Pin Sight, Sighting
To sight in scopes or single-pin sights at 10 yards, shoot a group of three shots. The windage and elevation of the sights are adjusted with the pin either left or right. Your arrows should hit your target at the point you aim. Windage adjustment ranges can usually be exceeded by loosening one screw so you can move the pin left or right.
In a Multi-Pin Sight, Sighting
Multi-pin sights are adjustable in three ways. The housing can be moved left, right, up, and down. There is also room to move the sight pins. Top pin for closest distance, bottom pin for farthest distance. Start at 10 yards, then sight in your top pin, which is usually 20 yards for most people. (1)
2. Take the First Shot

When you hit the bottom of your sight adjustment, try lowering the entire sight bracket and try your first shot.
Your Pin Adjustment

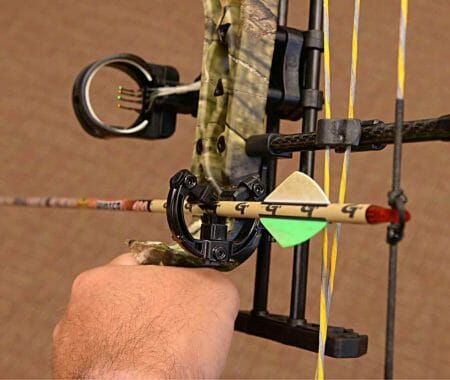
To prove your arrow’s clearance, put its fletching forward on the rest. Check the fletching of the arrow for contact with the sights or scope while holding it level. Use an adjustable extension on your sight, which provides higher hits.
Recording The Settings

When your arrows hit a different spot after you’ve been sighted in, check all screws on your sight and bow to ensure they’re tight. Video-record yourself shooting if nothing is loose. Better still, have a coach observe your shooting habits.
3. How Do You Align Your Sight

Loosen the two screws behind the sight. The sight bar will tilt if these two screws are loose. Lower screws should be able to move further than higher screws. Start with the upper screw. You can then make a few final adjustments before you tighten the lower screw.
4. The Duality Between the Sight and the Rest of the Arrow
The arrows may fly to the right or left even if your sight and rest are centered correctly. Depending on the situation, you can either adjust the sight or the arrow rest.
A recurve archer must adjust the plunger. You can adjust the plunger tension as a recurve archer. The plunger tension needs to be increased when the arrows fly to the right too much.
Ideally, arrow rest and sight should center on the center of the target of a compound bow. In this case, your technique might be problematic.
5. Why Don’t we Utilise the Windage Settings to Adjust for the Wind?

The wind is inconsistent, which causes problems. Seeing is not a constant thing. When a bow is fully drawn, its sight cannot be adjusted. As a result, it isn’t practical to adjust your sight to the wind. It is best to aim against the wind, in most cases.
6. How to Adjust the Bow Sight’s Second Axis
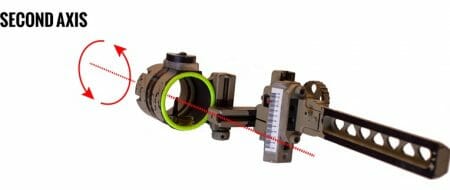
- Make sure your scope is perfectly parallel with your sight bar.
- Two screws need to be loosened to adjust the second axis.
- Affixed to your sight bar, observe the scope bubble when using the 3rd Axis Level.
- A scope will need to be adjusted if the bubble is off-center compared to the 3rd Axis Level.
- The housing must be moved to level the bubble.
7. How to Adjust the Bow Sight’s Third Axis

- Plumb a line as far as possible.
- To your sight bar, attach your 3rd Axis Level with a plumb bar.
Some Terminology
Elevation: An elevation refers to the distance from the ground to the sight.
Windage: It is the distance between the left and right of the sight. The point is to compensate for the wind.
Concluding Thoughts
When your technique is off, you may shoot clustered in one direction. The arrow might travel faster if you draw back a bit further. Therefore, don’t relax your sight. Your arrows should all have a skewed pattern one way or another. Be sure to work on your technique first. (2)
References
(1) yards – https://www.britannica.com/science/yard
(2) skewed pattern – https://www.investopedia.com/terms/s/skewness.asp
