
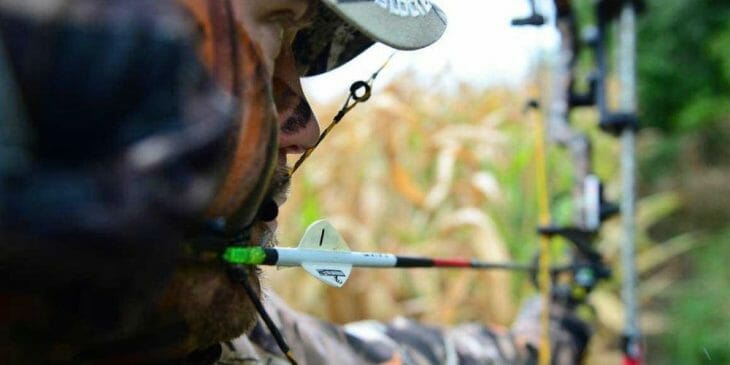
Several archers and bowhunters have difficulty getting their peep sight to line up correctly with their sight when they attach it to their bowstring. Learn how to adjust the peep sight on a bow for improved accuracy! Improve your aim with a few simple instructions. To assist you, here are a few tricks.
Bow Setup’s First Rule
Before you go hunting, make sure everything is in working order, especially your peep sights rotation. In general, If the peep sight isn’t perfectly aligned, you can temporarily correct it by letting down and twisting your D-loop so it rotates in the proper direction on the string. If this sounds confusing don’t worry, we’ll cover it in more detail below. It’s critical that the archer adapts to the bow rather than the other way around! Look here how Olympic archers swing their bows. It’s been a rule that when using a bow, never do anything unnatural or forced.
D Loops: An Overview

Before diving in let’s go through different variations. This will help you understand d-loops better.
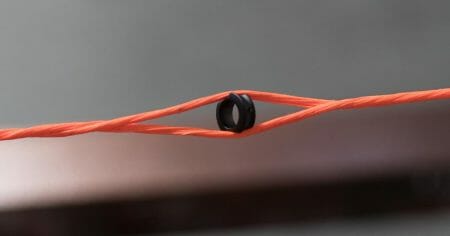
D-loop with no serving: Despite being the most straightforward variation to tie, it also offers the least options. D-loops are simply knotted onto strings without any other serving or nock set.
D-loop with single, lower nock set: A lower nock set, either tied or brass, is added to the basic d-loop. There is downward pressure on the arrow nock when the large d-loop knot is on top of the served nock. This is great for shooters using launcher-style rests or anyone else who would like some arrow pressure on the rest. It is also very popular among target shooters. (1)
D-loop with upper and lower nock set: These interfere the least amount on the nock withdrawing and firing, as well as being the easiest to replace since nock sets do not need to be removed.
Well, now that we are through the variations and advantages, let us dive into the process. In case you do not want to move strands or do not have access to a bow press, there is another way to align the peep. Using a static d-loop (one that is tight on the string and cannot be rotated freely) you can loosen the d-loop, rotate it so that it aligns with the peep, then tighten it again. When you hook up the loop to your release and pull back, the entire string will be twisted, making the peep rotate. You may need to experiment a little to get the center centered correctly, but you can do it.
You should not, however, force the string out of its natural orientation. In addition, the d-loop can shift and rotate itself to align with the direction of pull over time.
Step 1: Initial Peep Setup
It is usually necessary to install a d-loop along with the peep. Use a traditional d-loop that sits straight back on the string, without being twisted in any direction. The torqueless loop you use should be able to rotate on the string, so you do not have to worry about alignment since it will always self-align.
Torqueless loop installation: Torqueless loops are very versatile and offer a lot of benefits. Through the release, it is virtually impossible to impart torque to the bowstring and bow due to the nature of the loop. A release can be held in an infinite number of angles. (2)
It is possible to tie the loop by placing the nails 2 1/2 inches apart and using the loop under the arrow. Using nails that are 2 3/4″ apart is recommended if you want to tie a loop that will straddle the nock. To achieve a certain thickness, different loops will be required, depending on the serving thickness.
Start by aligning and centering the peep on the string. The most effective way to separate the strings is to use a bow press to relax the string.
Generally, it is more attractive and preferable to split the colors evenly on a two-color string. Choose the approximate height of the peep. It is usually best to compare it to another setup to be sure. Then slip it in between the strands. Divide the strands evenly if you have a single color or more than two colors.
Step 2: Setting the Appropriate Peep Height
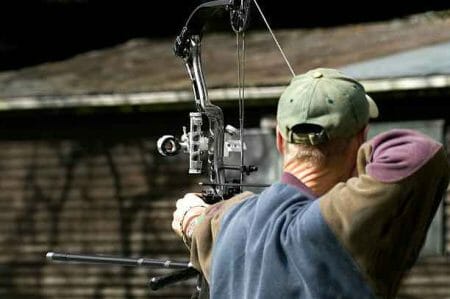
Setting the peep at the right height is the next step. It is easiest to get help from another person, but you can do it yourself if no one is available.
As soon as the peep is in the string, pull back the bow with your eyes closed and settle into your natural anchor point. Keep your eyes open without moving! Rotate the peep so it aligns perfectly and move it up or down the string until it is aligned with the sight aperture with some assistance. If you don’t have anyone to assist you, mark the peep’s position, let the bow fall, then move the peep up or down, and repeat until everything is aligned.
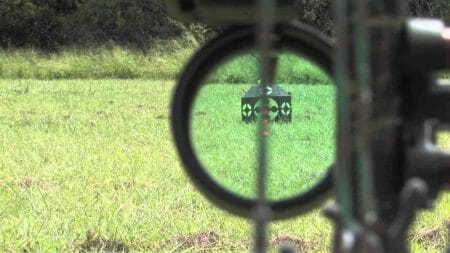
The sight ring must be positioned where you want it. Take a few shots to ensure the sight aperture is where you want it. Adjust the peep accordingly if it is not in the right place. Setting the peep height to the aperture position, and then moving the sight, may require you to adjust your eye up or down.
It is a good idea not to always set your peep height too close to your face. For instance, some people aim their sight at a wall or ten to twenty yards away to get their peeps set. If you are setting up a bow for 3-D archery, you will adjust the peep height on the range, at a target about 30 yards away. Since the longest shot will be 50 yards, you will have to set the peep height at this distance.
Step 3: The Peep’s Alignment
If you are shooting new strings for the first time, we recommend firing 12-20 shots through them. The goal is to settle the strings/cables and their twists.
It is most likely that the peep will not sit perfectly aligned with your eye once the peep height has been set correctly. You might have shot a few times through the strings. Adding or subtracting half a turn or a full turn to the string will allow the peep to be more centered. Rotate the bowstring after loosening any static d-loops and resetting them, so that they are aligned with the bowstring again.
You can sometimes align the peep into the proper rotation just by adding or removing a half or full twist. At the range, shoot a few shots with your bow to make sure everything settles in and stays there.
Step 4: Peep Alignment Fine-Tuning

Taking this step requires patience and work, but will result in a smooth rotation and a happier shooting experience. To loosen a bowstring, it is best to insert it into a bow press just enough for the string to barely twitch. You will need to remove one strand from one side of the front of the peep and to the other side, depending on the position of the peep. One strand should be removed from the second side and placed on the first side of the peep. As a result, the peep can be rotated within the natural twists of the bowstring and into the proper position.
Inspect the peep after you remove the bow from the press, depending on the results. In some cases, a pair of strands is enough, but in others, there are several pairs of strands needed. If you carefully adjust the strands, eventually a peep with perfect rotation will appear.
Here’s a good read also that you can check on how to aim a recurve bow without sights.
References
(1) pressure – https://www.britannica.com/science/pressure
(2) angles – https://www.mathsisfun.com/angles.html
