
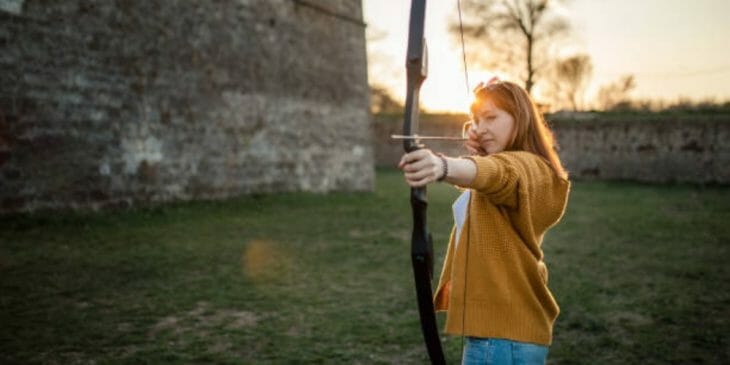
The best archers in the world don’t just pick up a bow and shoot an arrow. Here’s how to aim a longbow and what you need to know about this classic weapon.
While modern recurve and compound bows are equipped with advanced aiming aids such as bow sights and peep sights, longbow aiming, for the most part, remains instinctive. While aiming a longbow may prove a bit difficult to perfect for beginners, the speed and variety available to the shooter while aiming a longbow is unmatched.
Here, I’ll walk you through the ‘O’ ring method and the ground maker method. These two methods are by far the most versatile and the easiest to learn. After that, I’ll give you eight techniques that will train you to aim better instinctively. But, before that, you may want to bookmark these two article guides for your reading later on about aiming bow instinctively. One is how to aim a recurve bow without sights and the other one is on how to shoot a recurve bow instinctively.
Common Methods
1. The Ring Method

In this method, an ‘o’-shaped ring such as a rubber band is placed on the upper limb where the target should be. You can shoot a group using the under-the-chin style and move the band up or down depending on whether the group is centered above or below the target.
This method is analogous to using a bow sight and a peep sight. The ring acts as a bow sight, whereas the under-the-chin style does the job of a peep sight by establishing a consistent head position. You can also use the corner-of-mouth style, but the key is to be consistent with your style and use the same style as much as possible. An ‘o’ ring set for under-the-chin style will not work for shooting with the corner-of-mouth style.
2. The Ground Marker Method

Using a ground maker is one of the few ways that can improve your aim instantly. Here’s how it works.
When you shoot at the arrow, where the arrow hits depends on several factors, including the distance from the target. One factor here is the fact while shooting, the arrow is always below your eyes. This means that even if you were aiming at a target 2 feet away from you using under-the-chin style, you would hit a few inches below the target. Another significant factor is the drop due to gravity.
A ground marker is an object that allows you to account for these factors. At the beginning of a round, you shoot a group at the target while consistently aiming via your preferred aiming method. The keyword here is “consistently”; do not change your aiming method while shooting a group. Once you have shot about 5-7 arrows, walk to the target and measure how far below or above the target your arrows hit. Say your arrows hit 3 inches above the target. All you have to do is take a 3-inch object (the ground maker) and place it next to the target.
Now, you know that your aim is 3 inches above the target, but you can’t measure 3 inches from the distance. This is where the ground maker will help you in order to shoot at the target. Aim at a point the same distance below the target as the height of your ground maker. Since your ground makes in 3 inches tall in this case, this will allow you to set your aim exactly 3 inches below. This will move your group 3 inches below, allowing you to hit the target more accurately.
The Basics of Longbow Aiming
1. Develop your Stance
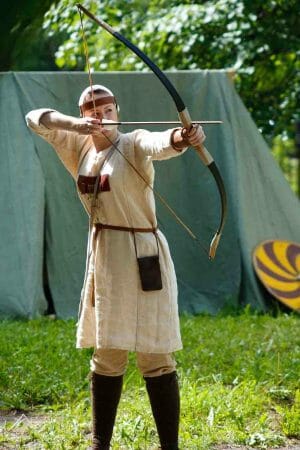
Stance can play a huge part in how accurately you shoot and how quickly you develop your instincts. When you’re shooting, the more you can focus your attention on your draw hand, the better you’ll be able to control your aim. Furthermore, your brain adapts its instincts via the feedbacks it gets.
For example, if you shoot a perfect shot, your brain responds to the positive feedback by taking notes on whatever you did differently that allowed you to aim better. If you have a lot of focus on unrelated muscles such as your legs, your brain will take the wrong notes, and you won’t learn anything. (1)
More focus on these muscles will also enable your subconscious brain to take notes on what makes you aim better and what doesn’t work. But in order to focus more on these muscles, you have to adopt a consistent posture that allows your body a stable balance while you’re shooting.
To improve your posture, stand in front of the mirror and draw your bow. Compare your posture to that of pro shooters and see what you’re doing wrong. In my opinion, looking at yourself while drawing is the best way to adopt a good posture.
The first thing you can do to adapt to proper posture is to place your feet in line with the target and keep them the same distance apart as your shoulders. This will give you a good balance. (2)
2. Nock the Arrow
It’s critical for good aiming that you’re consistent with where you place the nock between the nocking points. You can choose to place it right next to the upper nocking point or the lower one, but be consistent and do not switch. Also, make sure the cock fletcher is facing you as you nock the arrow.
Now, place the spine of the index of your bow hand.
3. Position your Hand

While drawing the first three fingers are used. This is because the pinky is quite smaller than other fingers and is not able to apply much force anyway.
Your index finger should be placed on the nock, while the other two fingers should be below the nock. Make sure there is enough space between your index finger, your second finger, and the arrow. Try to keep the rest of the hand as relaxed as possible.
4. Pre-draw Preparation

Here’s something you can do you improve your upper body posture while drawing. Once the arrow is in place, Raise both your arms together and get the bow in place. Your draw arm should be parallel to the ground at this point. Do not focus on any muscles of the draw arm other than those you need to push the bow as you draw. Now, raise your elbow and get ready to draw.
5. Draw

Take a deep breath before you draw. As you draw the bow, remember to do it in a slow and steady motion. The biggest set of muscles you will be using while drawing is your back muscles. Make sure you use your back muscles as much as possible. If your elbow is raised while you draw, it will ensure you don’t use your biceps to pull.
While drawing, focus on pulling the string instead of pushing the bow. It sounds like the same thing, but this focuses your attention on the draw hand, where it should be.
6. Establish a Reference Point

The reference point is the point where your hand and the string touch your face. Depending on the style and facial structure, different people have different reference points. It is much more important to be consistent with your reference point than what the reference point is. A consistent reference point allows you to aim better and helps you adopt instincts.
7. How to Hold the Bow

Once the bow is drawn, you will have to hold it in place while you’re aiming. It may be difficult to hold the draw in the beginning, but you will get better with time. If you’re unable to hold the bow for more than a few seconds, you might have to get a longbow with a lower draw weight. Here’s how to adjust the draw weight on a bow.
However, your back muscles can be trained just like any other set of muscles. You can accelerate the process by drawing and holding the bow as an exercise for your back muscles without drawing an arrow. In fact, you can do this standing in front of a mirror to develop better posture at the same time.
8. Aim

Aiming a longbow is significantly more difficult than aiming other bows since it requires instinctive aiming. However, you can significantly improve your aim if you keep all the variables consistent. A rubber ring can help you aim better but where the ring should be placed depends on other factors such as nocking point. If you keep changing the way you aim, it will be harder to have a base to improve upon.
It may seem tempting to move the ‘o’ ring up or down depending on how far you’re shooting, but I would recommend setting it to one short fixed range. For targets farther than that range, try to learn how far below the ‘o’ ring on the limb you have to aim from for a given range. Alternatively, if you have a consistent style, you can place multiple ‘o’ rings for different distances.
The most important thing to focus on while aiming a longbow is, again, consistency. Develop a comfortable, stable, and consistent posture, develop a consistent knocking point, and, most importantly, develop a consistent aiming style. Once you have a uniform method of drawing and aiming the bow, you will start getting more precise with your aiming and shooting.
References
(1) muscles – https://www.britannica.com/science/muscle
(2) proper posture – https://medlineplus.gov/guidetogoodposture.html
