
The Fundamental of Instinctive Archery
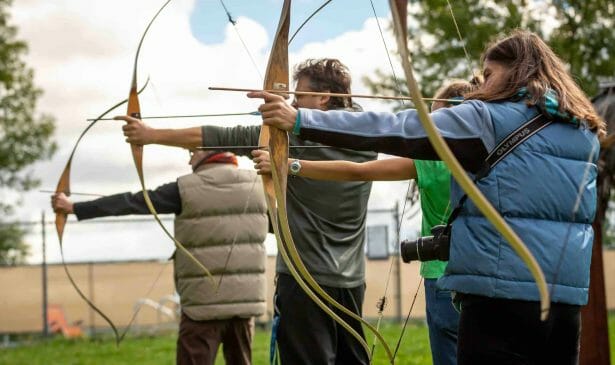
Instinctive archery is a method of “aiming by not aiming” that has been practiced for thousands of years. It is the practice of shooting a bow, usually a classic wooden bow, longbow, or recurve bow with no sights attached. Instinctive archery refers to an art form in which you can shoot your arrows accurately without consciously targeting or using any aiming systems or techniques. Archery evolved from instinctive archery. True instinctive-intuitive archers learn to totally trust the power of their subconscious, mental strength, shooting experiences, muscle memory – their body sensation – and instincts to direct their arrows to their target. The only way to attain your goal is to trust and give control to your subconscious mind. Here are some basics of Instinctive Archery
When Should You Shoot Instinctively?

Instinctive shooting is similar in that it takes a lot of practice to master, but once mastered, it may be deadly. It will become second nature to shoot your bow, learning the arc of the arrow at various distances. After a while, you’ll be able to mentally picture the target.
Many traditional archery purists believe that intuitive shooting is the only real style of shooting. The most natural of all shooting skills are instinctive shooting. Simply put, you look where you want to shoot and shoot where you’re looking. Playing shortstop in a baseball game is similar. The player catches the ball and throws it to first base without considering the force of the throw, the arc of the ball, or the distance. It simply becomes a taught procedure in which the mind can determine the arc of the arrow, the distance, and how to hold it in respect to the target without conscious thought. (1)
Choosing the Correct Stance
A good stance provides the foundation for a good shot, yet it’s a very personal thing that requires practice. Every archer’s body type, size, and strength all have an impact on our shooting position.
Consider your body in two halves: the upper half, which includes your arms and chest, is your power unit, and the lower half, which includes your hips and feet, is your foundation unit.
As a result, You’ll get a perfect stance that will not only help you maintain your aim, but it will also make executing your shot much easier. A natural and stable stance will make aligning the rest of your body much easier, and once every element of your alignment is correct, a consistent and accurate shot will be much easier to accomplish. Instead of copying other archers, listen to your body and work with it to find the best position for you.
The Shot Order
You will want to make sure your foundation is stable before you even think about shooting. The optimal position is where your body slightly leans ahead, which helps you to cope when you shoot.
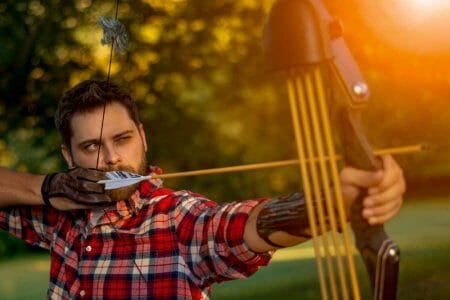
With both eyes it’s practically impossible to aim, thus you have to ensure you aim with your dominant eye. A clearer picture of your surroundings is shown through your dominant eye than your other eye and usually aligns with your dominant hand.
One strategy to select your target is to concentrate on your natural goal. A wonderful workout is to get into your shooting posture to find your natural aim and close your eyes. Use your muscle memory, then open your eyes and verify your relationship with the core of your goal.
You want to ensure that you focus fully. You wear proper ear protection, so you do not have an external distraction. (2)
Your Hand Grip for Drawing
A relaxed hand and fingers are required for a secure grip technique. If you are concerned that too much relaxation would lead you to drop the bow when shooting, you should attach a sling to your bow that wraps around your wrist.
To draw a recurve bow, with one hand, you grip your bow, and with the other, you hold the string. and pull from it while keeping the arm of your bow horizontal. It’s necessary to keep in mind that you use a bow with the appropriate draw weight for you. Try not to use one with a heavier draw weight than yours.
The String Walking
A barebow archer string walks by keeping the tip of the arrow directly on the target at all times. To hit a goal, we move our fingers down the string, away from the arrow’s nock, then pull from various points on the string to shoot at varying angles. The closer our fingers are to the nocking point, the flatter the arrow’s launch angle becomes, resulting in a lower strike and a shorter flight distance.
The procedure of drawing the string is rather simple. To properly grab the string, the most frequent shooting styles are barebow and Olympic. You must decide which shooting style you want to practice because different styles have different methods of grabbing the string. (3)
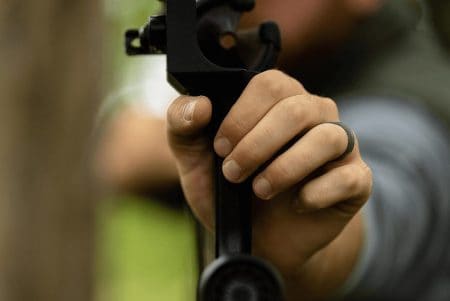
The Grip on your Bow

Grip the bow’s string and pull from it to fire. When looking at your left hand, the bow should rest on the thenar eminence, also known as the pads of your thumb, which is the place to the left of the lifeline or palmar crease.
The reason for this is that using the pad of your thumb involves fewer muscles than fully gripping the bow with your entire hand, which adds stress to your grip and can lead to inconsistencies in form and undesirable torque.
The bow grip should not cross your hand’s lifeline. Having too much hand on the bow and gripping it hard places your forearm in line with the string.
After you’ve drawn the bow, what’s next? It’s time to let your arrow shoot after you’ve aimed it. Despite how straightforward it may appear, there are complexities to releasing. It can be divided into two parts: the initial release and the subsequent follow-up. We’ll shoot from the anchor point at the corner of our mouth for barebow shooting. The follow-through is more elegant in the Olympic style. When you’re at full draw, you’re resisting the force that the string puts on your fingers as it pulls.
Shooting the Gap

Gap shooting is one of the most common aiming methods used by archers who do not utilize a sight. It’s an aiming technique in which you use the tip of your arrow at full draw as a reference point and put it a certain distance below or above the target you want to hit.
Gap shooting is a common beginning place for archers, as you may recall from our beginner’s notes or barebow archery before progressing to string walking. The restrictions differ significantly between target, WA Field, and WA 3D, so examine the shooting rules to see what is best suitable to you and your bow style.
Exercise in Gap Shooting
Starting to gap shoot is simple, but setting up your setup demands some effort. You can use whatever release pattern that you are comfortable with. Choose one target to shoot at, and it’s fine if you have to make marks to put the point of your arrow on. Shoot a lot that way!
After a few weeks, you should be able to consistently strike the target this way. After a bit of practice, try firing instinctively. Your muscles will remember how to hit the target from previous shots, and even if you change your form, you will shoot better. Because gap shooting necessitates distance measurement, it is ideal for predetermined target shooting.
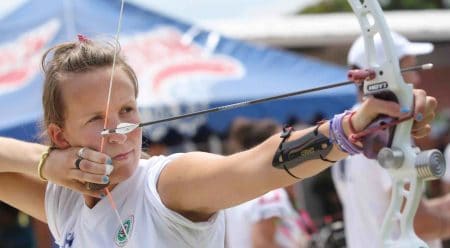
Your Point of Anchor
Taking archery lessons is the greatest approach to figure out where your anchor point is. For barebow archers, pressing their index finger to the corner of their mouth or on the canine teeth is a common anchor point. Some archers use a higher anchor point to aid in aiming with the arrow’s tip. Touch your canine tooth with your middle or ring finger as an example. To improve consistency, barebow archers align their bowstrings.
The jawbone is the main point of contact for Olympic recurve archers by using the index finger or tab shelf to touch the jaw. In order to increase accuracy, the Olympic arches are aligned with a reference point on the bowstring. This is called the string alignment technique and enhances horizontal consistency.
Personal style, shooting technique, and facial shape all influence traditional and barebow anchor locations. That’s why archers try out different anchor points until they find one that works for them.
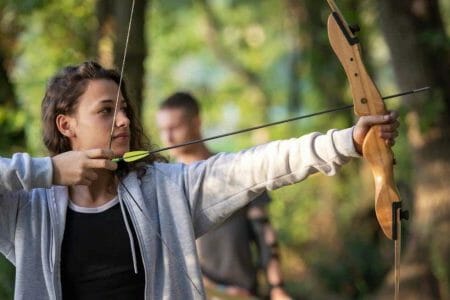
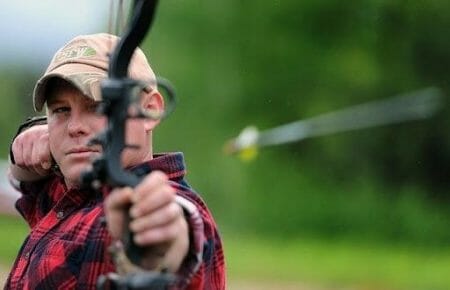
Seeing and Shooting – Intuitive Shooting

The see and shoot approach is as simple as it sounds: you look at the target and then shoot at it – no aiming required. It’s the same for folks who are just starting out with the see-and-shoot approach for shooting. The reason the arrow moves where you want it to is all due to muscle memory. This type of archery needs a lot more work, and it can take years to become truly adept at this totally instinctive technique of shooting.
You should focus your attention on the particular point on the target that you intend to shoot, rather than the entire target. You must maintain hyper-focus on the one-inch round circle on the target you’re firing at until the arrow has struck the target. Shooting and maintaining your pose until the arrow hits is an excellent habit to develop. You simply aim at a target, pull an arrow, and shoot it without aiming or calculating distance. It appears to be easy, but there is a lot that goes into it. Because the muscle memory and hand-eye coordination required for this approach take time and effort to develop, intuitive archers frequently practice a lot.
You practically have to force yourself not to look at the arrow because before you shoot it’s strangely instinctive to look at the arrow. Concentrate on the precise small place, ignore the thought of your shooting’s bigger goal. A great habit is to shoot and hold your posture until the arrow hits you.
Training Exercises for Instinctive Archery
The exercises listed below can be used in your practice sessions to help you develop both gap shooting and the see and shoot technique, respectively. If you’re passionate about both instinctive shooting approaches, include them both into your daily routine; training both of them over time will almost certainly turn you into a pro-traditional archer.
See and Shoot Excercise

Take a paper cup and place it on top of your standard, circular target with the open side towards you. Begin by shooting from a distance of merely three yards. Simply look at the target’s center and shoot, as instructed above.
Continue shooting at this range until you can reliably group the bulk of your arrows in the cup’s center. Once you’ve mastered this, return to five yards and repeat until you can consistently group at that distance.
Simply keep on going back a yard or two at a time from here on out. Oh, and if you’re wondering why you’re using a paper cup, it’s to help you practice your eye for actual, 3D shooting.
Gap Shooting Exercise
Begin with a ten-yard range to the target. Shoot a dozen or more arrows at the target, aiming for the space between the arrow point and the target’s center. Continue repeating this until you can get the arrows to congregate closer and closer to the target’s very center.
Return to fifteen yards and repeat until you can comfortably group most of the arrows in the middle of the target. Move back to twenty yards once you’ve mastered grouping arrows at fifteen yards. Once you’ve mastered twenty yards, it’s critical to keep things interesting by shooting at various distances. This will aid you in better assessing range at various distances.
If you stay with it most of the time, consistently mixing it up will bring a lot of progress.
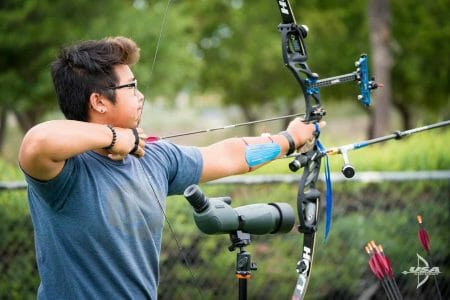
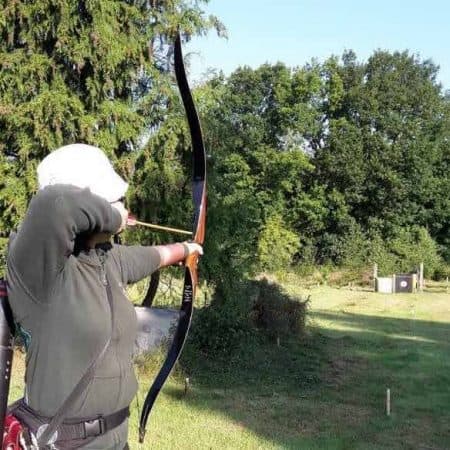
Choosing a Bow

Making the choice of how to choose a recurve bow is way easier than you might think. You might have become overwhelmed after looking at all the numerous models available. This is natural for a beginner, but the truth is that you may start with any recurve and be very happy with the results.
If shooting practice is your primary goal, any recurve bow for beginners would suffice. If your primary purpose is to hunt, any recurve bow will suffice as long as it has a draw weight of 40 pounds or more. Almost every recurve bow on the market is available in the 40-pound weight range, so you won’t have any trouble finding one that’s right for you.
Longer bows are more precise, but they’re also more difficult to move in the field and/or fit comfortably in a blind. If hunting is your primary goal, keep in mind the length and avoid anything longer than 62 inches, preferable 60 inches.
Choose between a Take-down bow and a one-piece. For starters, make sure the actual bow does not weigh more than 3.4 pounds. Choose a bow that is at least twice the length of your draw.
Selecting Arrows for Your Bow
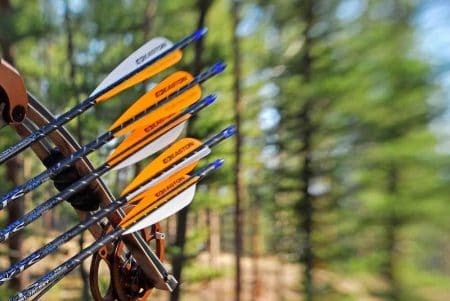
When selecting an arrow, there are several key factors to consider. The overall weight and stiffness of an arrow can affect how it flies. It’s critical to make sure your arrow is the right weight for the type of shooting you’ll be doing. The weight of your arrow is also important in determining how well your bow manages stress.
If you choose a bow with high draw weight, you should select a stiffer arrow, whereas if you use a bow with low draw weight, you can select a weaker arrow. If you shoot a low-poundage bow with a stiff arrow, the arrow will not bend very much and will not reach very far.
The length of the arrow plays an important role while choosing an arrow. An arrow must be stiffer as it increases in length. The length of the arrow is directly related to its bendability.
The weight of the tip of your arrow has a lot to do with how much your arrow bends and is an important factor when purchasing an arrow. especially if you’re a hunter with a broadhead on the end of your arrow.
Choose the arrow of the right material. The spine of the arrow is affected by the material if it is made of—wood, aluminum, or carbon.
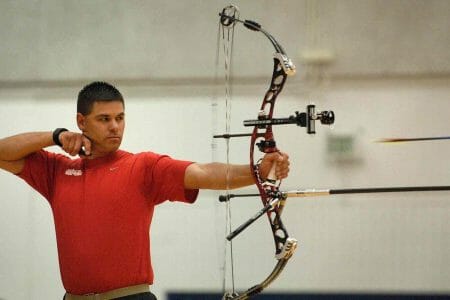
Getting Sufficient Equipment

The first step in recurve tuning is to put everything on your bow. This contains the arrow rest, the clicker, the sight, and the stabilizers, among other things.
The nock fit on the string has a significant impact on tuning. It also affects the sound of the bow. You must use a center serving thickness that provides the proper nock fit for your string and nock selection.
Regarding poundage, To draw up your bow at a close range, use a pair of scales. This is your draw weight when the clicker is at full draw. Then simply rotate your bow’s limb bolts until you obtain the desired weight.
Tiller for your bow should be set before you begin to recurve tuning. To aid tune, you can adjust the poundage of your bow slightly, but it’s best to start with a poundage that you can manage and stick with it. It doesn’t matter whether your tuning is good if you shoot a bow that is too heavy for you because shooting it properly will be difficult.
References
(1) baseball game – https://www.britannica.com/sports/baseball
(2) ear protection – https://www.cdc.gov/niosh/topics/noise/reducenoiseexposure/adminppe.html
(3) Olympic – https://www.britannica.com/sports/Olympic-Games
