
When it comes to correct bow holding, archers that do not have enough experience make two typical mistakes. The first is having a tight grasp on the bow when you should have a relaxed grip. Second, archers move their hands too quickly after releasing the arrow, causing the shot to flounder.
For you to fully understand how to hold a bow properly, here is a brief discussion of the steps below:
Method 1: Compound Bow

You may be unsure of the correct grip position. Well, it goes like this; if you’re right-handed, you should grip the bow in your left hand. Bear in mind that you should use your dominant hand with the release. (1)
1. You Should Grip the Bow in an Angle
Extend out your dominant hand perpendicular to the ground. Turn it around 20 to 35 degrees clockwise. Your fingers should be loose and spread out in a relaxed, natural way. This is the position in which you should hold the bow. (2)
Turn the bow counter-clockwise rather than clockwise if you’re using your left hand.
You must resist the urge to use the bow to “shake hands.” To put it another way, don’t grab it from a straight angle. Because your hand will be off-center with the grip, the bow will be more prone to twist as you use it.
2. Allow the Bow Grip to Slip into Your Hands Pocket
Observe the pocket that forms within the palm of your hand while your hand is still in its prior posture. Slightly raise your fingers and slide your grip into this natural nook.
The only safe place to keep the bow is in this pocket. If you clasp the bow grip with other areas of your palm, your hand may shift once you exert force.
3. Relax Your Fingers around the Grip
Allow your dominant hand’s fingers to rest comfortably along with the bow’s handle or grip. The tip of your index finger should rub against the back of your thumb; however, the rest of your fingers must be loose and wrapped gently around the handle.
Method 2: Crossbow

Crossbows are a popular choice for both new and veteran bowhunters. They have a short learning curve and precise accuracy.
1. Hold the Crossbow like a Rifle
You should rest the back of the crossbow against your shoulder. Using your non-dominant hand, maintain the crossbow’s barrel near its center of gravity and grip the back of the crossbow around the release.
The rear of the bow should be directly above and barely inside your armpit. Maintain a safe distance between your fingers and the trigger mechanism. When firing the bow, your index finger should be the only finger that is not bent.
2. Raise the Crossbow to Shoulder Level
Instead of holding the back of the bow with your shoulder, you lay the bottom back on top. While your dominant hand rests near the trigger, your non-dominant hand maintains the barrel at its center of gravity. It would be best if you consider securing the grip of the bow’s barrel with your non-dominant hand.
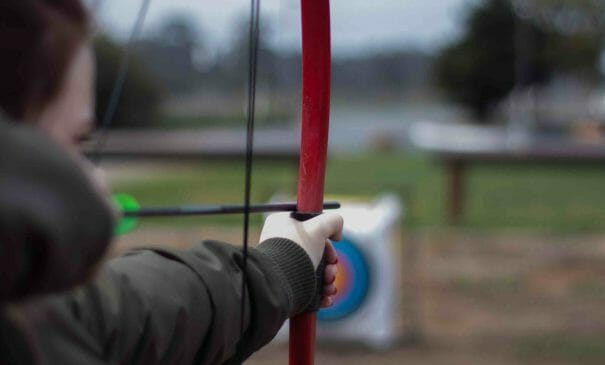
Method 3: Basic Recurve Bow

The hook and grip are the two persistent contact points with the bow during the shot in recurve archery, and they are the two permanent contact points with the bow throughout the shot. As a result, consistent technique necessitates the use of the set position.
1. Hold the Bow Parallel to the Ground
Once you initially pick up a recurve bow, make sure it’s in a horizontal position. You should align the bow vertically with the strings and the complete assembly facing the ground at a 90-degree angle.
2. Grip the Bow with Your Non-dominant Hand
You should tuck the grip into your non-dominant hand’s pocket. This pocket usually forms a natural gap between your palm and thumb. Examine your lifeline to ensure that it is straight up and down.
3. Make a Fist and Wrap Your Fingers around the Grip
Your index finger should wrap around the front of the bow handle and slightly brush with your thumb from the other side. The index finger and thumb should both feel firm but not tense.
The index, middle, ring, and pinky fingers of your fist should always venture down diagonally at a 45-degree angle from the bow.
4. Relax Your Arms
As you draw or release the bow, keep your fingers in the same position. Also, keep in mind that the strain should solely exist in your hand. In other words, maintain a relaxed wrist, arm, and shoulder.
Method 4: Longbow

The longbow is one of the most ancient yet famous bows that you can find on the shooting line in both clubs and tournaments. In the best of circumstances, achieving precision with a longbow may be difficult, and for archers who are new to the style, it can be intimidating. However, you won’t need to worry because I will teach you the right way to hold a longbow to achieve consistency and accuracy.
1. Maintain a 90-degree angle with the bow
You must position the wrist grip of a longbow lower to ensure proper balance. You’ll need to apply pressure with the heel of your hand, and the center of gravity will be further away from the arrow.
2. Contact the Bow with the Ball of Your Thumb Joint
Place the bow grip on your non-dominant hand so that the main point of contact is directly on the base of your thumb. The bow should sit just outside the thumb joint.
3. Wrap Your Fingers around the Bow Grip
You may have to experiment with finger arrangement to obtain something that is both firm and comfortable, but the thumb and index finger will provide the majority of control.
Wrap your thumb around the back of the bow. Slightly and not dramatically lay your hand on the grip’s inside edge.
4. Keep the Force in Your Hand
As you shoot, keep the pressure on the ball of your thumb and keep your wrist as straight as possible. For you to keep the stability in your hand, your elbow must be level with your shoulder. You should never force your wrist to flex, and you should maintain as much pressure off your arm muscles as possible.
Understanding Good Grip
The way you position your bow hand – the hand that holds the bow – on the bow grip is known as gripping. To avoid unpredictable shots that travel high and low or left and right, you must position your grip the same way every time. The grip is one of the most underappreciated aspects of the shot, but it may have a significant impact on how your arrows fly.
A Good Grip is Not the Standard Bow Grip
Commonly, when archers first pick up a bow and walk up to the firing line, they instinctively grab the bow with both hands. It’s understandable, though; most beginner archers are aware that launching an arrow is a dangerous sport, and they’re attempting to be cautious.
Holding a bow with a relaxed grip seems quite risky, especially if you’re shooting a bow with a draw weight that’s a bit difficult for you.
Little did you know that the proper grip on the bow should be light and soft.
The Proper Bow Grip is Relaxed (Why it’s bad to Apply Pressure?)
Holding the bow tightly causes tension to your arm and hands. And the more you apply pressure to your grip, the more the bow will shake.
Your bow will move more and tremble a lot, causing you to miss a shot. Therefore, practicing a more relaxed grip will help you improve your precision.
References
(1) dominant hand – https://journals.sagepub.com/doi/pdf/10.1177/175899830300800101
(2) degrees – https://www.mathsisfun.com/geometry/degrees.html
