

You’d be surprised to know that traditional bows and arrows can be made out of some of the most mundane household items. Of course, the efficiency of these bows won’t be on par with professionally constructed bows, but if you’re a beginner, and just want to try Archery out before spending money on an expensive pro bow, then creating one using cheap household materials would be a great way to save money. It could also prove to be a good opportunity to test your creativity.
Making your own bow is indeed a great DIY project. Learn how to make a homemade bow with this detailed tutorial. The tutorials below are made of materials found in your home, but if you want some adventure outdoors, here’s one you should read, our article on how to make a bow in the forest.
Materials Needed
Before you get down to work, it’s best to get all the materials you need to make a full-fledged bow. Here is what you would need to make a bow using 3 different methods.
- Wooden Branch
- A hand saw
- A string
- A sharp knife
- Duct tape
- Popsicle sticks
- PVC pipe
- Hacksaw
- Pipe foam
Method 1: Crafting a Bow out of a Branch
One of the easiest and cheapest ways to make a bow is using a branch for this project. You can find a Usable branch from your yard. Here’s how to make a DIY bow.
Locate and Cut your Bow Stick

Begin by locating a branch that can be conveniently separated from the rest of the plant or the tree. You use a hand saw to detach the branch that is preferably 1/2 inch in diameter. Next, grab a pair of pruning scissors and remove any offshoots of the branch. Shorten the length of the bow in such a way that it is as long as the distance between the ground and your belly button.
Wrap a String Around the Top of the Bow
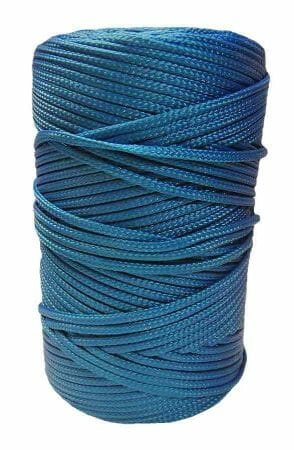
Grab a piece of thin rope, or wire and wrap it around one end of the branch. Tie the knot as tightly as possible, or tightly enough that it doesn’t slip up or down, also, make sure that the notch of the bow keeps the string in place. A braided nylon string is perfect for this project, but you can also make do with any other kind of thin and strong wire you have lying around your house.
Cut and Bend the Bow
Next, you have to carve the ends of the stick to bend the bow. Use a sharp knife for this task. Place the bow’s top at a flat surface, and begin cutting, then apply some pressure on the bow’s end to bend it gradually. Be gentle during this step as you won’t want the branch to break or get cracked. Next, grab the rest of the string, and pull it down the bow’s end. Wrap the string on the other end a few times below the notch, and top it off by tying a knot.
Place the Electrical Tape on the Bow and String
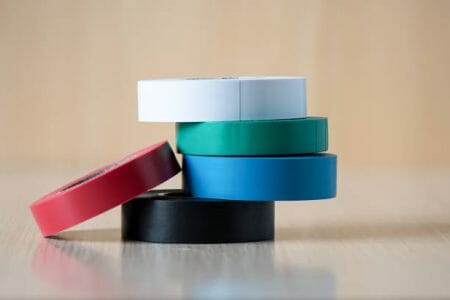
To ensure that the ends of the string sit in place while you draw the string during shooting, wrap some duct tape over the ends. You could consider wrapping some duct tape in the mid-section of the bow to make a DIY hand grip. This could make aiming, and shooting the arrows simpler.
Create Arrows
After you’re done making the DIY bow, you should also make a handful of arrows to practice shooting with. For this, you would need electrical tape, wooden dowels, and a set of feathers.
Step 1: Grab some 18-24 inch wooden dowels.
Step 2: Wrap duct tape on the top end and the bottom end of the dowel.
Step 3: Use a sharp knife to make cuts on the end of the arrow.
Step 4: Cut a feather using a sharp knife.
Step 5: Take some feathers and stick them around the end of the arrow.
All done!
Method 2: Crafting a Bow out of a PVC Pipe
There is another way of making a bow, and that would require some tubes of PVC.
Cut the PVC Pipe

Grab a sturdy PVC pipe and divide the whole pipe into 3 sections of 40 inches each. You can use a measuring tape and a marker to divide the sections. Now, cut the PVC pipes In the Location where you made the marking. For this, you would require a hacksaw. A tooth jigsaw would work too.
Cut Two Notches into the PVC Pipe

Begin cutting a notch at the top of the PVC pipe with a saw. Make the cut at least 1 inch deep. Repeat on the other end of the PVC as well, and ensure that the notches align.
Prepare the Nylon Rope
Grab the nylon string and make a knot on both ends of the rope. The knot should be thick enough to prevent it from slipping through the notch. You can also use a lighter to burn the ends of the nylon to prevent it from fraying.
String the Bow

Now take the nylon string and tuck it inside the notch you created. After that, neatly wrap the rope on one end. 5 inches further from the pipe, cut the rope. The rope would need to be tied about 4 1/2 inches from the ends. You can burn the ends of the rope here too to prevent fraying.
Now you would have to bend the pipe a little and place the rope into the notch situated at the bottom of the pipe in such a way that the knot is slid inside the pipe. You can secure the pipe inside by using some duct tape. It would guarantee that the pipe doesn’t move about much.
Create a Hand Grip
A handgrip can be created by a pipe foam that you could buy from any local store that sells things like PVC pipe. Cut a 6-inch pipe foam, and slide it above the PVC pipe that you’ve worked on. Push the foam to the center of the pipe, and bring the two edges of the foam together. You can secure it by putting a zip tie in place. The ends of the zip tie could be severed using scissors.
The bow is all ready to be used!
Create Arrows
For this bow, you’d need to create unique arrows. You can make the arrows using dowels, and home insulation of about 2 inches of thickness. You’d also need some hot glue and a knife. Grab a knife and make 3 x 3-inch triangles on the home insulation foam. (1)
Place the dowel in the middle of a triangle’s three sides that you created. Now, remove the dowel, and use a hot glue gun to coat the end. Place the dowel back into the foam arrowhead. You can finish off making the arrows by slitting the dowel’s end with a knife. This would make it easier for you to string the arrow, and release it. Now that you have both the bow, and the arrows under your belt, you can get down to working on those shots.
Method 3: Crafting a Mini Kids Bow out of a Popsicle Stick
Another way of making a bow is using a popsicle stick, which you can get from any departmental store.
Create Notches in the Popsicle Stick

Grab a popsicle stick and a knife and begin cutting 2 notches parallel to each other at both the end of the stick. From the tip of the end, the notches should be 1/2 inch away.
Soak the Popsicle Stick

Now to make the popsicle stick a bit bendy, soak it in water to soften the stick. Allow it to rest in the water for about 1-2 hours. You can soak for more than 2 hours too, but ensure that you at least keep it in water for an hour, otherwise, it won’t bend easily.
Shape the Popsicle Stick into a Bow
Use the strength of your thumbs on both ends to bend the stick, and give it the shape of a bow. Start from the mid-section, and make your way to the ends to give the stick a C-curve. Keep going until the stick looks like a bow. Once done, use dental floss to make the string of the bow. Tie the ends of the dental floss to the notches of the stick. Wrap the thread several times to secure it. You can also consider applying some glue to keep the floss in place.
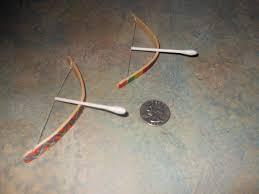
Make Q-tip Arrows
For the tiny stick bow, you’d need to make tiny arrows. Using Q-tips is perfect for this. Just grab a nail clipper, and clip off the end of the Q-tip until it looks like a cotton swab. Finish off by making a slit at the bottom using a knife. Your Q-tip arrows are now ready to be fired. (2)
You may want to check the video below;
Other article guides that you may want to read later on as it fits your need;
References
(1) insulation – https://www.energy.gov/energysaver/types-insulation
(2) Q-tips – https://www.rd.com/article/meaning-of-q-in-qtips/
