
Learn how to make a compound bow string with this tutorial. It is easy to do, well go through the minutiae and different methods within our article.
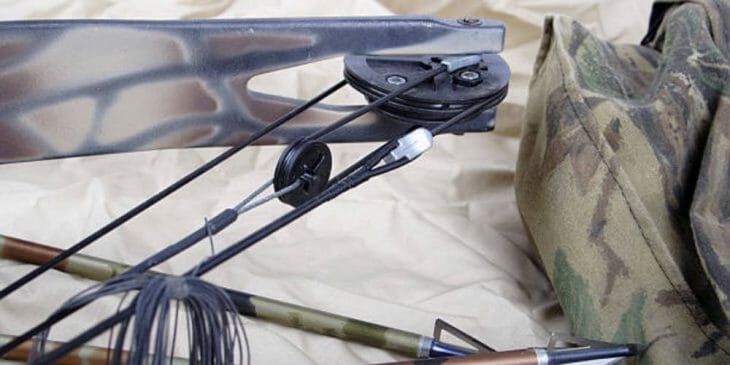
A compound bow’s bowstring has numerous strands of string fabric combined and tied with a tying material called “serving”. A compound bow should be strong enough to handle maximum tension and shoot arrows at a very large distance. You can make a capable enough bowstring by using numerous strands of “serving” in the bowstring creation process.
We understand that creating your bowstring can be quite a difficult challenge. However, you can create your bowstring by using some easily available tools. The majority of people use a common technique called “continuous loop” to create a perfect bowstring. This technique is mostly used in creating bowstrings in compound bows and recurves. Here’s an article for you to know more about recurve vs compound bow.
Winding the String
The first step towards creating a bowstring is to determine its length. Start by measuring the length of the bow; that will help you decide the length of the bowstring. In recurves, the bowstrings have to be three and a half inches shorter than the bow’s length. However, the length is present on the manual guide or one of the bow’s limp as a stamp in a compound bow. You can also borrow an existing string from a fellow shooter and measure its length. Through the ways mentioned above, you can get the exact length of your bowstring.
Once you have the bowstring’s length, you must determine another important aspect- the number of strands. In simple words, a bowstring’s strand number depends on the draw-weight of the bow. You should also consider another factor like the string’s material breaking strain. You will need some basic math to get the final figure of the strands. Follow the simple instructions mentioned below:
- Multiply the bow’s draw weight by four.
- Divide the answer by the string material’s strain weight.
Taking a hypothetical example, a bow with a draw weight of forty lb and ten lbs of the string’s material strain weight would need sixteen strands. (1)

You should set up the string jig after determining the bowstring’s length and the number of strands. But during the string jig setup, remember to modify the length according to the bowstring you are making. Set the winding posts in a straight line, and lock the bolts. Measure the string length from post-A to post-D or from post 1 to post 4.
Proceed with the process by tying one end of the bowstring material to post-A or post 1. This post is located on the far-left. Now the winding string process comes up! Continue by winding the string around post-D or post 4, and bring the string back to the initial post-A or post 1.
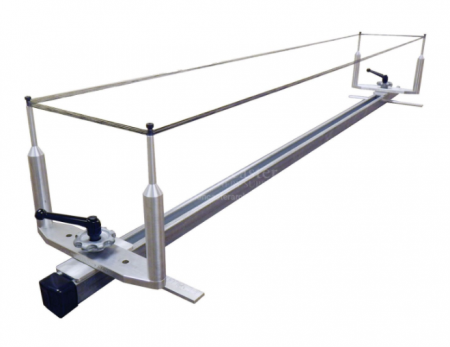
You have to repeat this winding process around the string jig until you get the number of strands through the calculation. Remember that a strand is equal to half the loop, and to get a complete loop has two strands wound around the string jig.
End the winding string process by untying the initial end of the loop from post-A or post one and tying it to the farther end of the string.
Create the Loops

After winding the strings, it’s time for creating the loops. Start by measuring your bow’s loop size. Again, borrow a bowstring from a fellow shooter or get the estimated measurements through an old bowstring.
Normally, a bowstring loop’s sizes are somewhere between two and a half inches to three and a half inches. After measurement, determine the center of the string between post-A and post-B.
Use your measurement of the string loop to mark the end-loop points equally distant from the center of the loop.
For example, if your string loop is 4 inches in total, mark the string material 2 inches on both sides of the center of the loop.
Serve the Loop
Lay one inch of serving thread along with the string material between post A and post B.
Now use the same serving thread to wind the string material, and the 1-inch serving string together between posts A and B. 10 to 15 turns of serving thread is enough, but there is no harm in doing more turns. Leave about ¼ inch of serving thread on the loose end uncovered.
Now bind the string material from ¼ inch after the left end-loop mark to about ¼ inch before the right end-loop mark. Pull the ¼ part of the string that you left uncovered to tighten the binding and use glue to secure it.
Wrap the Nocking Point
The correct position of the nocking point determines the accuracy and the total force the arrow will experience. (2)
After removing the string from the jig, give it several twists to make sure the string is twisted evenly throughout.
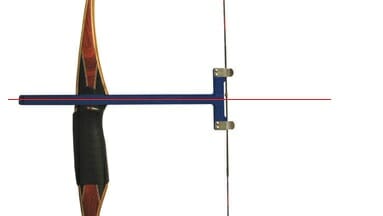
You will need a bow square to accurately determine the position of the nocking point. Place the bracket-shaped side of the bow square on the string and touch the top of the arrow shelf with the other end.
Use the markings on the bow square to mark the nocking point and the serving area on the string. If the bow square does not have markings for the serving area, mark the top end of the serving 2 inches above the nocking point and the bottom end of the serving about 3 inches below the nocking point.
Use a 1-inch-long piece of serving thread to mark the nocking area by wrapping it around the string right below the nocking area. Now wind the serving material around the string and the 1-inch nocking area. Leave about ¼ inch of serving thread loose.
Grab the loose serving thread and pull it to tighten the serving binding.
Wind the loose end as well after tightening the serving binging and use glue to secure it to the string.
Do the same on the other side. Cut the serving thread of the appropriate length, tighten it, and use glue to secure it.
Wax the area of the string that is not covered with serving, and your string is ready.
Tips
The number of strands you need depends on the draw weight. Compound bows can have a draw weight of up to 65 pounds. The larger the draw weight, the more strands you need to build your string. The good news is the many strings manufacturers provide a table that can tell you the number of strands you need based on your draw weight.
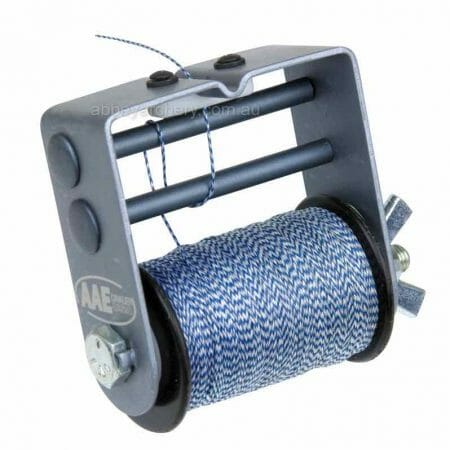
You can use a serving jig to apply tension throughout the serving as you bind the string.
Use a bow press to string your bow. You can also use it to measure your string length before you make your string. And if you want to wax your string after, you may want to see this article on how to wax a bow string.
Make sure the thickness of the string matches the cam, and the size of the loop matches the axel on the cam.
Compound bows are able to produce a lot of draw weight, but that also exerts a huge about of tension on the bowstring, causing it to deteriorate with time and possibly even break.
Now that you know how to make your own string, you make yourself a new string every time you break one. You can even adjust the thickness according to your needs and determine the optimal thickness for you.
References
(1) lb – https://www.britannica.com/science/pound-unit-of-weight
(2) total force – https://www.coursera.org/lecture/mechanics-particles-planets/lesson-4-4-calculating-total-force-hiTZ3
