
If you’re new to archery and on a budget, you may need to know how to string a recurve bow without a stringer. Learn the proper form with tips from an experienced archer.
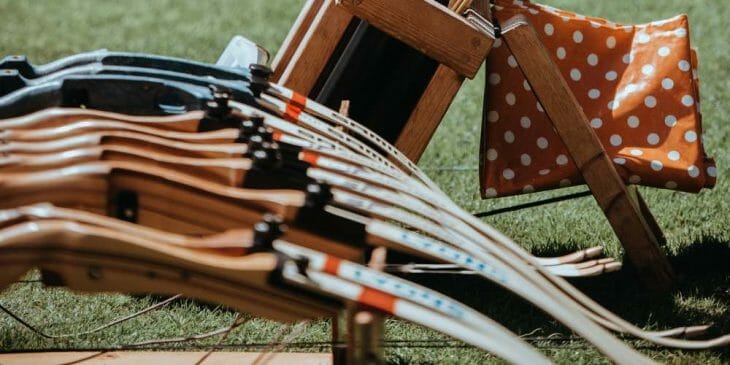
When you use a stringer it has the least chance of the bow breaking accidentally. However, you may not have your stringer on you at all times. For those times, it may come in handy to know how to string a recurve bow without using a stringer
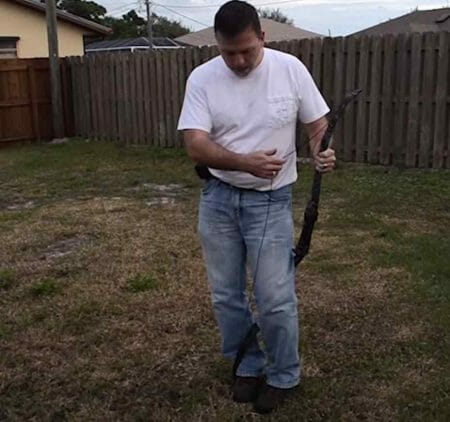
Step 1: Fit the string’s bottom loop in the slit in the lower limb. The larger loop should be loose, and both the string and the bow should be the right way up.
Step 2: Place the inside of the curve of the bow against the outside of your right foot and pass the bow from below your left thigh, holding the top limb. The right foot will keep the lower end in place, and the left thigh will act as the bending point as your right hand pulls on the bow.
Step 3: Pull the upper limb bending the bow and fit the upper end of the bowstring in the slit in the upper limb.
Step 4: Make sure the string is properly fit on both ends.
Below we discuss three of the most common ways to string a recurve bow.
The Safest Way: Using a Stringer

Using a stringer is the easiest and safest way to string a recurve bow. Here are the steps you need to follow to string a recurve bow using a stringer.
Inspect the Bow Prior to Stringing
Before you string your bow, inspect the bow for any fractures. You may have to look closely to see hairline fractures. Also, try curving the bow using your hands a bit and see if any fractures appear.
Insert the String on the Bow
Pass one loop of your string through one loop of the bow. Don’t fit this end of the string into the slit yet, or you will not be able to reach the other end with the string.
Now take the other end of the string and fit it in the slit.

Insert the Stringer Ends
Take the cap end of the stringer and cap it on the limb where the string is fit in the slit. Insert the loop end of the stringer from the other end of the bow.
Pull from the Bow
Grab the bow in the middle, step in the center on the stringer, and pull the bow upward. This should curve the bow at least as much as it is curved when it is strung.
Insert the String
Keeping the bow curved, fit the loose looped end of the string into the slit with the other hand.
Gradually Release the Pulling on the Bow
Make sure the string is fit in the slits properly and gradually release the bow. Remove the stringer, and you have successfully strung your bow.
You may check more in the video below;
The Step-Through Method
This traditional method requires your bowstring to be about 4 inches shorter than the bow. Here’s the method with its steps.
Step 1: Fit the string’s bottom loop in the slit in the lower limb. The larger loop should be loose, and both the string and the bow should be the right way up.
Step 2: Place the inside of the curve of the bow against the outside of your right foot and pass the bow from below your left thigh, holding the top limb. The right foot will keep the lower end in place, and the left thigh will act as the bending point as your right hand pulls on the bow.
Step 3: Pull the upper limb bending the bow and fit the upper end of the bowstring in the slit in the upper limb.

Step 4: Make sure the string is properly fit on both ends.
You may check more in the video below;
The “Foot Bracing” Method
This method is simpler than the step-through method, but it requires a certain amount of arm strength and skill. This method is potentially dangerous and should only be used with safety and precaution. Here are the steps.
Step 1: Fit the lower end of the string on the lower limb of the bow.
Step 2: Step inside of the lower against the front of your foot. Do not step too hard on the limb, or it may get damaged. The lower end should be held tightly in place, however.

Step 3: Place one hand in the middle of the bow and the other at the upper limb.
Step 4: Pull the bow from the middle while pushing the upper limb forward.
Step 5: Use the hand on the upper limb to drag the string loop towards the slit and fit the string in the slit while bushing the limb.
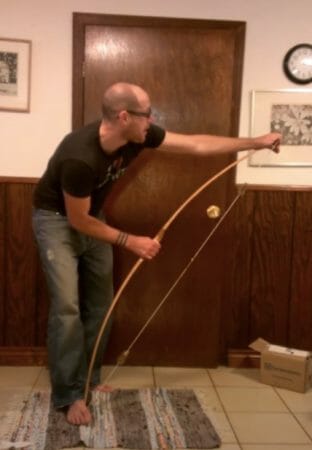
Step 6: Check and make sure the string is fit properly.
You may check more in the video below;
What to Wear when Stringing your Bow by Hand
Stringing your bow without using a stringer may be dangerous. You must take some precautionary measures in case the bow or the limbs break during the process. You can wear safety glasses or sunglasses to protect your eyes. You may also need to wear gloves for better grip, especially for the foot bracing method. Wearing heavier shoes may help grab the lower limb better.
What if I Don’t Have a Stringer?
If you don’t have a stringer, the second safest method to string your recurve bow is the step-through method. However, the push/pull method is the easiest to learn.
Push/Pull
Before you start this process, make sure you take safety precautions like wearing gloves and safety glasses.
Insert the larger loop from the upper limb. Don’t fit it in the slit just yet.
Fit the smaller loop in the slit on the bottom limb
Grab the bow in the middle using your right hand and place the lower limb again on your right foot so that it stays in place when pulled towards you.
Grab the upper limb using your left hand and pull the middle of the bow while pushing the top. This is the “push-pull” part.

Fit the string into the slit as you bend the bow.
After-stringing Calibration
The bowstring may not have fit into the slits properly. You can easily drag the string loops to fit it properly. Make sure you do this step before drawing the bow. (1)
Unstringing: How and Why
A stringer and the step-through method can be used to unstring the bow as well. However, you need to be more careful while unstringing because the bow will try to straighten as soon as you unstring it. In order to avoid injuries, keep applying force as you unstring the bow.
It is important to unstring the bow after using it because storing the bow that way may cause it to change its shape permanently, resulting in lower bow weight.
It’s best to use a stringer while stringing a bow, but if you don’t have a stringer, you may use other methods such as the step-through method or the foot bracing method. However, make sure you take extra precautionary measures, especially while using the foot bracing methods. (2)
References
(1) Calibration – https://www.sciencedirect.com/topics/engineering/calibration-process
(2) precautionary measures – https://www.britannica.com/topic/precautionary-principle
