

Stringing a recurve bow is the process of using the limbs and string to create an arched shape in the bow limbs. There are many steps involved in this process, but it is worth the effort.
The recommended way to string a recurve bow is to start by bending each limb so that the tips of each limb are touching each other. Next, tie an end of one string around one limb tip and use this string to tie around the other limb tip. Feeding both strings through loops on both limbs creates an arch shape known as “the grip.” The last step is tying on both ends of the second string to form a final arch shape that holds tension on both arms of the recurve bow.
You can string a recurve bow following these steps:
- Get a stringer
- Insert the string on the bow
- Insert the stringer ends
- Step on the stringer
- Pull from the bow
- Insert the string
- Gradually release the pulling on the bow
- Check again
Step 1. Get a Stringer

Stringers are made for the purpose of stringing a bow. They are easiest to use and are not liable to cause any damage to the bow, the string, or you.
Stringers come in many shapes and sizes. However, the most common ones have lace and two ends. Some stringers have a cap at one end and a loop at the other, whereas others have caps at both ends.
To continue with the following steps, you will need to have a stringer.
Step 2. Insert the String on the Bow

If you have a takedown bow, assemble it before this step.
Take your string and pass it through one of the limbs of the bow. You should not fit the string into the slit just yet; if you did, you wouldn’t be able to reach the other limb with the string.
Once you have passed the string through one of the limbs, fit the string into the slot on the other limb. Confirm that one end of the string is passed through the limb while the other is fit in the slit.
Step 3. Insert the Stringer Ends

Once the string is in place, it is time to insert the stringer. The stringer we are using has a cap on one end and a loop on the other end. Just as you did for the sting, insert the loop through one of the limbs (the one you passed the string through) and pass it beyond the string loop from the previous step. Now put the cap on the other limb (the one where you fit the string in the slit) such that it covers the end of the limb.
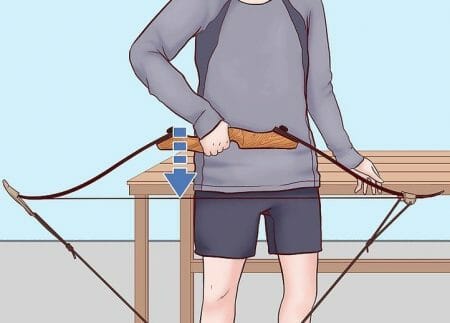
Step 4. Step on the Stringer

Once the string and the stringer are in place, the fun begins. Hold the bow from the center in a horizontal position such that the string and the stringer hang downwards. Bring the bow low such that the stringer touches the ground and then step on the stringer. Some archers step on the stringer with one foot, while others prefer to step on it with both their feet. Both of these ways work. If you prefer to step on it with both your feet, remember to keep the feet close together.
Step 5. Pull from the Bow

While you have your foot (or feet) on the stringer, pull the bow holding it in the middle such that the limbs bend. As you pull the bow up, make sure that the stringer loop is as close to the end of the bow as possible, and use your free hand to drag it there. Doing this ensures that the bow is bent from the ends, the same way it is bent during a draw.
This part may seem scary to a beginner. You might fear that the bow will break. A lot of archers go through that. We would like to assure you that you do not have to worry. If it helps, you can picture the stringer as being the bowstring and your foot as a hand drawing the bowstring. When you pull the bow in this way, it experiences the same amount of force as it would during a real draw. The bow is designed to be under and handle that force. This fear will go away with time.
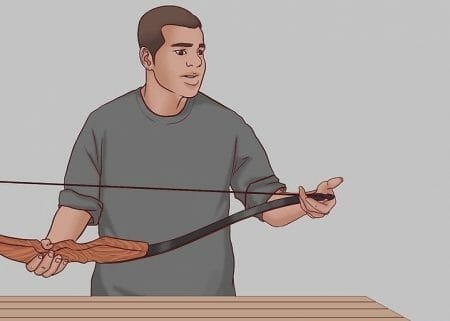
Step 6. Insert the String

While you’re pulling the bow up and it is bent, use your free hand to drag the bowstring loop to the end of the limb and fit the loop into the slit. This step is difficult for some people in the beginning; they find it hard to pull the bow with one hand and fit the string loop in the slit with the other. But this gets easier with time.
Step 7. Gradually Release the Pulling on the Bow
Before you let go of the stringer or loosen the bow, make sure that the ends of the string are well-fitted into the slits. Once this is confirmed, you can start loosening the bow by gradually putting it down. This will loosen up the stringer while the string will get tighter as it is pulled from the limbs.
Once the stringer is loose, remove it by first removing the cap from one end and then the loop from the other end.
Step 8. Check Again
As soon as you complete the previous step, you have successfully strung your bow. To be sure, check once again if everything is in place. You may pull the string a few times to see if everything is working all right. Pulling just a few inches is enough; you do not have to pull at full draw to confirm this.
FAQs
What if I don’t have a stringer?
If you don’t have a stringer, you could make one yourself making your life easy. Once you know its basic parts, you can be creative and make it yourself; it’s pretty easy to make.
If you don’t want to have to carry a stringer around, there are other methods you can use, such as the push/pull method or the step-through method. (1)
How to find a replacement recurve bowstring
You can easily find a replacement recurve bowstring in any archery store or at an online archery store.
Tips on how to cleanly release the string when shooting?
Do not try to open your fingers fast; you cannot open them fast enough anyway. Just relax your fingers and let the arrow release.
What’s the proper way to care for / store a recurve string?
However you store it, to prevent the fibers from separating, there should be enough twists on the string. If you find your fibers still separating, wax your string. (2)
One of the safest ways to string a recurve bow is to use a stringer. A stringer can be purchased from an archery shop, but you can also easily build one yourself. Using a stinger is fairly simple to string a bow, and you learn it easily. There are a few steps that you will get better at with time, but they are doable for beginners nonetheless. If you do not have a stringer, you could use the push-pull method, which is the second most common.
References
(1) push/pull method – https://www.smartinsights.com/marketing-planning/marketing-models/push-pull-product-distribution-model/
(2) fibers – https://www.youtube.com/watch?v=PDuiSnBYCQc
