

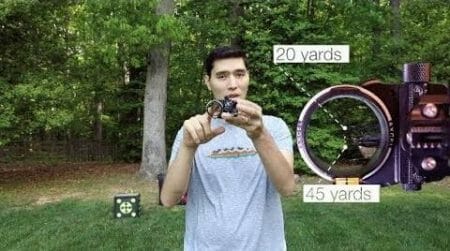
Archers who use compound bows usually install sighting devices on their bows to improve their accuracy when hunting and shooting targets. There are many sight configurations that are very common to see, and they are commonly found with one to four pins that are mounted on a bow’s riser. In this scenario, the pins can be moved up and down or left and right according to the distance the pin is set for.
So, what is the procedure for adjusting compound bow sights?
With these instructions, you will learn how to adjust the sights on your compound bow. As a result of adjusting your bow sights, you’ll be able to shoot at different distances and improve your accuracy and overall skill. For more references, you may check how to adjust bow sights.
Step 1: Loosen the Pin’s Inner Collar

To begin, loosen the inner collar on the pins so that the tips of the pins are centered over the inside edge of the arrow when it is knocked. You need to loosen those screws and use your Allen wrench to use the top section and push that down a little bit just a couple of notches since that will help you aim higher and then adjust the back section.
Aim a little more to the left and push the ball a little more to the right. In order to be assured that the pins are evenly spaced, the outer collar can be loosened so that they can be moved up and down in the bracket. To ensure that the collars stay in place, both the inner and outer collars must be tightened. This initial setting allows you to move each pin without covering other pins so you may make modifications during the sighting. You should be right on the bull’s eye if you adjusted it by the proper number of notches.
Step 2: Shoot Three Arrows into the Target From the 20-Yard Line
The skill of shooting an arrow at a target is often used to judge archers. The archer’s shooting would be considered precise if he shoots three arrows in a tight group. A shooter’s accuracy would be affected by where he is standing and where the arrows are. By using the top pin, you should begin on the 20-yard line and shoot three arrows toward the target. When sighting, make sure you place the pin directly in the middle of the target.
Whenever the arrows miss their mark, you do not need to be concerned about it. Your reason for the shooting is determining the consistency and the desire to have the arrows in a tight group.
Step 3: Move Pin to Arrow Group
You can fine-tune the sight by moving the pin toward the arrow group. Begin by moving the pin-up or down in a vertical direction. If your sight has multiple pins, set the pin at the top to be closest and the pin at the bottom to be farthest.
With a single pin sight, you can mark the sight tape to keep track of your setting. You should use your sight to track the arrows for your horizontal adjustments. Move your sight up if the arrows hit high. Move your sight down if they hit low. That’s all it takes. You should keep moving away from the target until you run out of pins or your groups become inconsistent if you want to shoot to farther distances.
It takes some guesswork and checking to see. Trying to perfect your sight adjustment won’t discourage you if you make a mistake. All you can do is keep making small adjustments and try to make good shots.
Step 4: Continue by Shooting Three more Arrows

If you wish to change in the horizontal direction, shoot three more arrows and move the top pin to the left or right. At this point, the arrows can land to the right or left of the target, but they must strike the verticle center before proceeding to the next step. If the set of arrows is to the left of the center, move the pinout or to the left. The pin should be moved in or to the right if the arrows are to the right of the center.
Step 5: Shoot Three other Arrows

The top pin needs to be adjusted to both the right and left for adjustment in the horizontal direction by shooting another three arrows. Moving the pinout or arrows to the left is required if the set of arrows is in the center-left. On the other hand, if the arrows point to the center-right, then you should move the pin in that direction.
Step 6: Repeat the Process of Sighting in a Vertical Direction

The next step requires repeating the sighting process in a vertical direction at 30 yards with the second-highest pin, at 40 yards with the third-highest pin, and at 50 yards with the bottom pin.
Measurements should be taken every ten yards, up to 50 yards from the target. Your bow sight will be sighted at thirty, forty, and fifty yards, respectively. (1)
Try shooting arrows at the target from the 30-yard mark using the second pin this time instead of the top pin as you did before. Next, you can track the misses again and make any necessary vertical adjustments, moving the sight box itself.
Stand at the 40-yard mark and repeat the process by shooting three arrows at the center of the target, this time using the third aiming pin on the sight. Instead of adjusting the sight box, use your Allen wrench when you need to correct the arrows that are hitting too high or too low.
Proceed to the 50-yard mark with the bottom pin in the same manner.
Tip: As you sight in the bow, do everything in your power to maintain constant anchor and release. Doing so will allow you to shoot tight groupings. However, if you want a high degree of accuracy, your groups must be close enough for your hand to reach all of them. (2)
Following the contents above step by step and adhering strictly to the instructions will make adjusting your compound bow sights easier. Here’s a bonus tip for you on when do bow sights work best. Until our next article!
References
(1) Measurements – https://www.britannica.com/technology/measurement
(2) degree of accuracy – https://www.mathsisfun.com/definitions/degree-accuracy-.html
